A batch of hard bread (pani duru) is handy to have on hand in your pantry for quick and easy lunches or snacks. Especially delicious topped with fresh chopped tomatoes, olive oil and oregano!
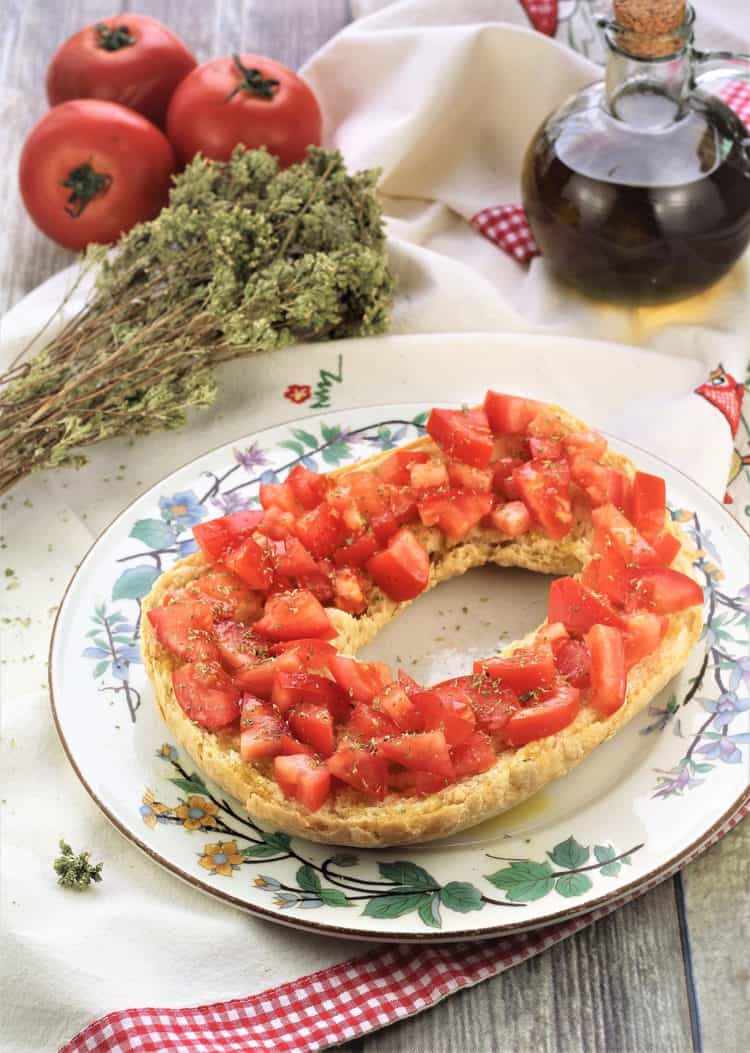
Hard bread or pani duru, as I refer to it in Sicilian, is basically my mom’s bread recipe. Freshly baked bread rings are cut in half and baked a second time at low temperature for a long period in order to try them out.
This also happens to be the same bread recipe my mother uses to make her traditional Easter bread with eggs (cuddura cu l’ova).
Origins of Hard Bread (Pani duru)
Some of you may be familiar with friselle, the bagel shaped bread that’s twice baked until crisp and dry. Similar, right? However at our house, as well as in Sicily, we call this pani duru.
So I decided to consult my expert in Sicily, my cousin Graziella, who informed me that friselle are the small individual shaped hard bread whereas pani duru is basically a regular sized loaf of bread that’s halved and baked again until dry.
This bread was prepared in Sicily by my grandmother and used for several purposes which I’ll share with you further below. Since this bread is dry, it keeps indefinitely and therefore large batches of it were prepared and stored.
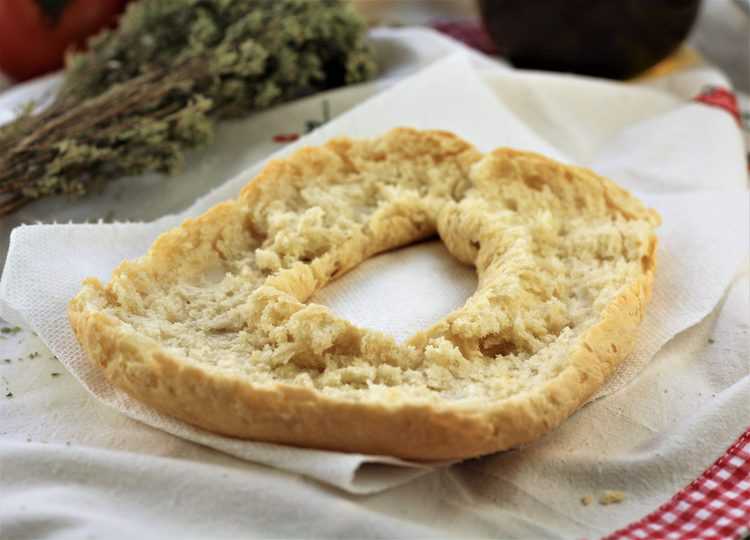
I’ll admit that, as a child, each time I complained that I was hungry and found nothing good to eat in the house, my mom suggested pani duru with tomatoes and olive oil. However, back then I wasn’t too interested in this. How silly I was!
How to serve hard bread:
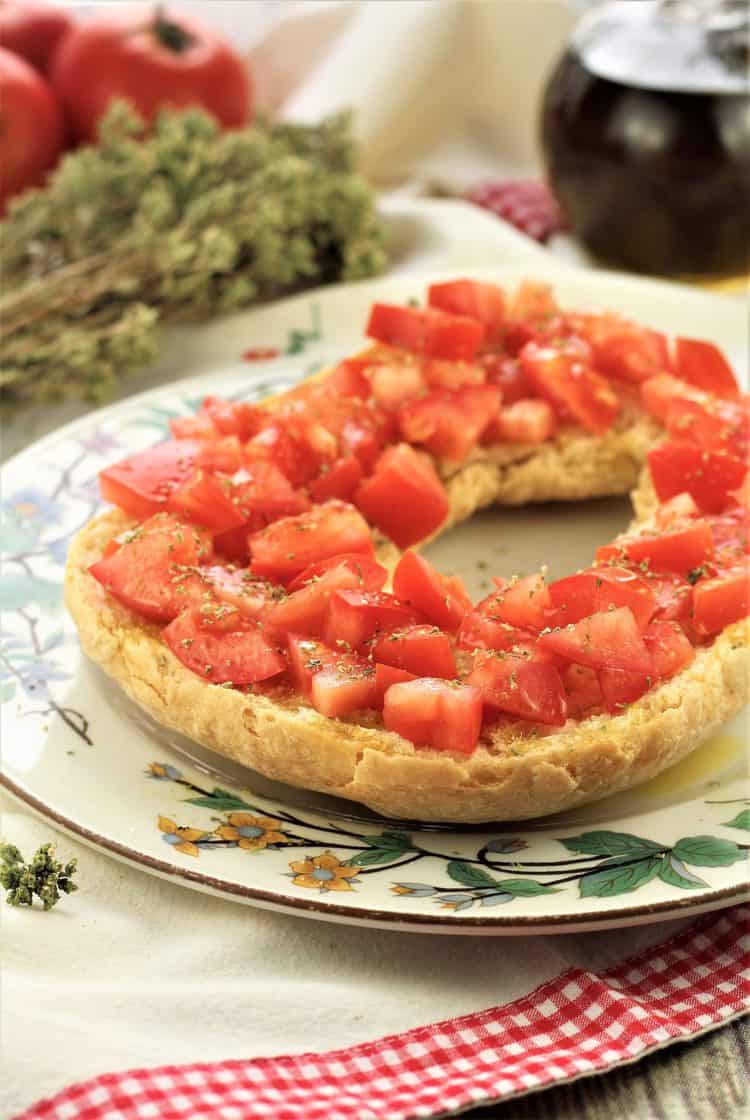
There are numerous ways to serve this bread, however the most popular way (as well as my favorite) is topped with freshly chopped tomatoes and drizzled with olive oil and oregano. The bread is first softened by briefly running it under cold water. I insist on briefly as you want the bread to be soft, but not fall apart!
This is what we call pani cunzatu or dressed bread at our house. In Sicily, pani cunzatu is made with fresh bread or day old bread and served as a sandwich with tomatoes, olive oil, oregano and sometimes cheese or even anchovies.
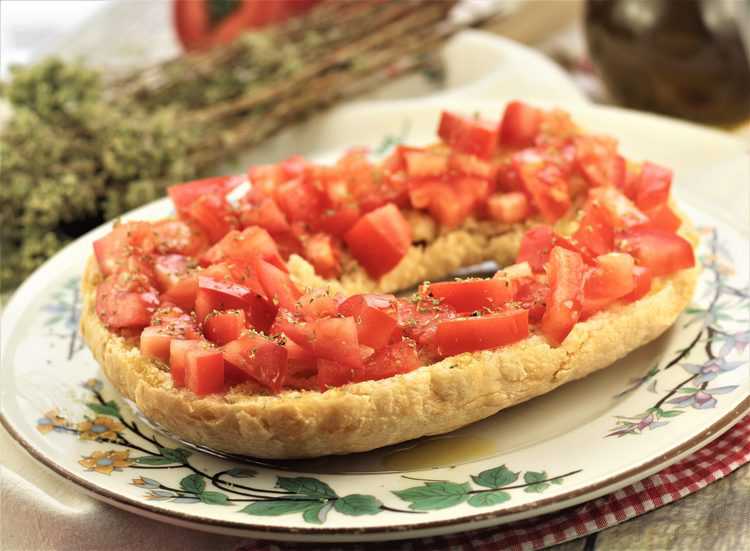
Another way my mom often serves it softened with water and drizzled with olive oil as well as red wine vinegar and oregano. Odd combination, but a must try!
I can’t think of a better snack. Then again, add a few olives and slices of cheese and this is my idea of a perfect lunch!
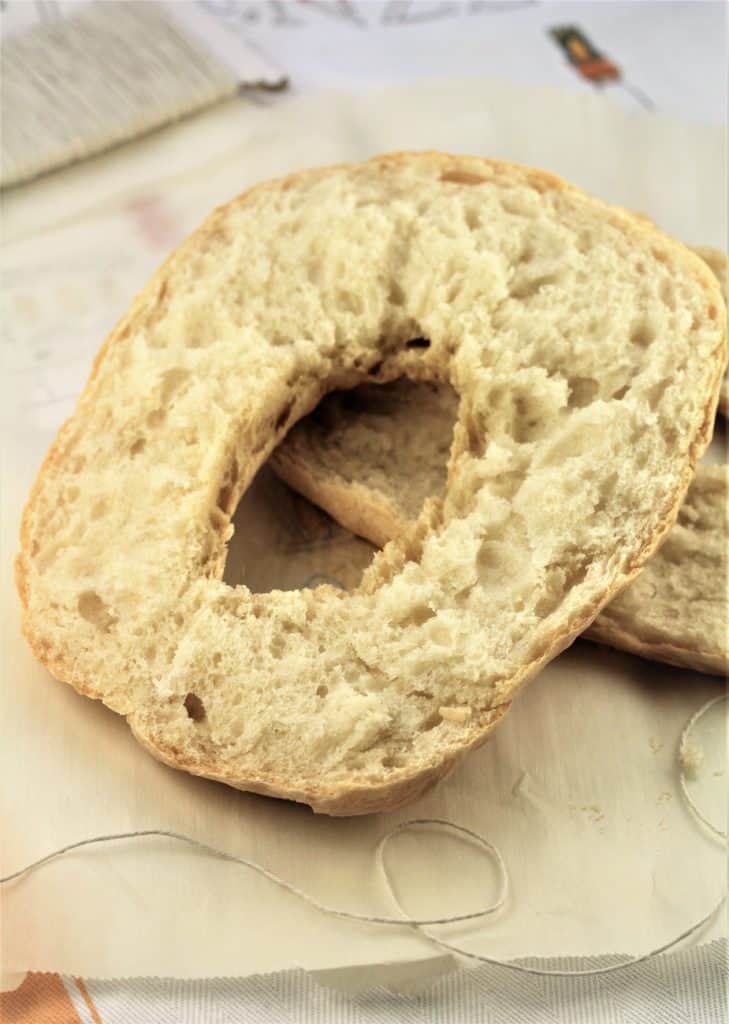
As a child I recall my parents served hard bread with warm milk poured over it. The milk softened the bread, to the point that it became quite soggy, and this was their breakfast! Doesn’t necessarily sound appetizing however this was a filling, comforting way to start the day. This was a very common breakfast in Sicily when my mom was growing up.
Pani duru is also great for soaking up the delicious juices in dishes such as Stewed Green Beans with Tomatoes. My dad often placed a few pieces of bread in the tomato infused broth and let it soften as he ate the green beans. Just the thought of it brings me back!
Let me walk you through the basic bread recipe for making hard bread. You’ll find the complete printable recipe at the end of this post.
How to make Hard bread (pani duru)
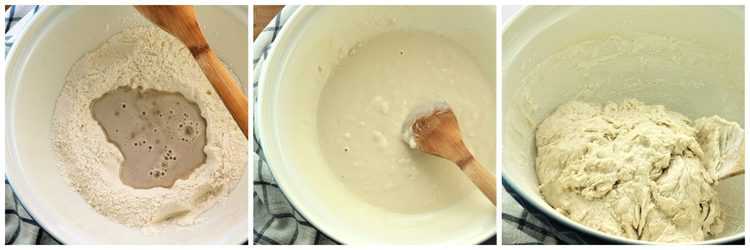
As in all bread recipes, begin by proofing your yeast. In a small bowl, dissolve dry yeast and sugar in 1/2 cup of lukewarm water. Let sit for 10 minutes until it bubbles.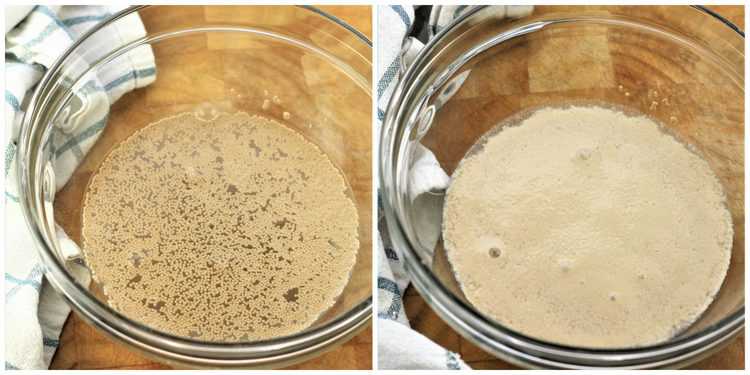 Meanwhile, stir flour and salt in a large bowl. Make a well in the center and pour in the yeast mixture. Stir with a wooden spoon until a crumbly dough forms. Pour in another 3/4 of lukewarm water and stir. It will be very liquidy. Add the remaining flour and stir until a dough begins to take shape.
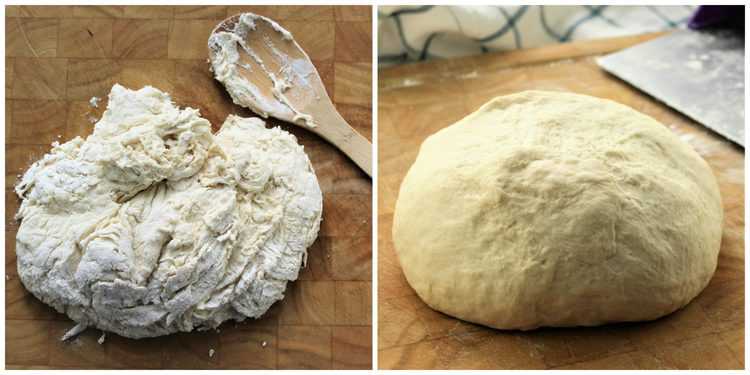
  Place the dough on a lightly floured surface and knead for about 10 minutes until a smooth, elastic dough is formed.
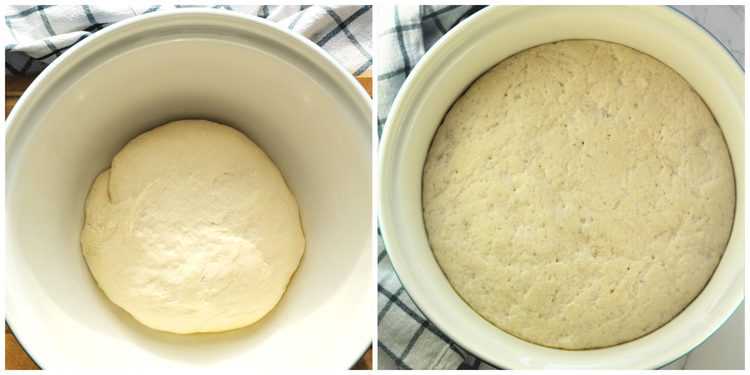
 Place in a large bowl greased with olive oil, cover with plastic wrap and set aside to rise for 2 hours. After the dough has risen, punch it down and divide in half.
 Roll each half into a long rope and seal the ends together to form a circular or oval shape. Place on a parchment paper covered baking sheet and let rise another 30 minutes.
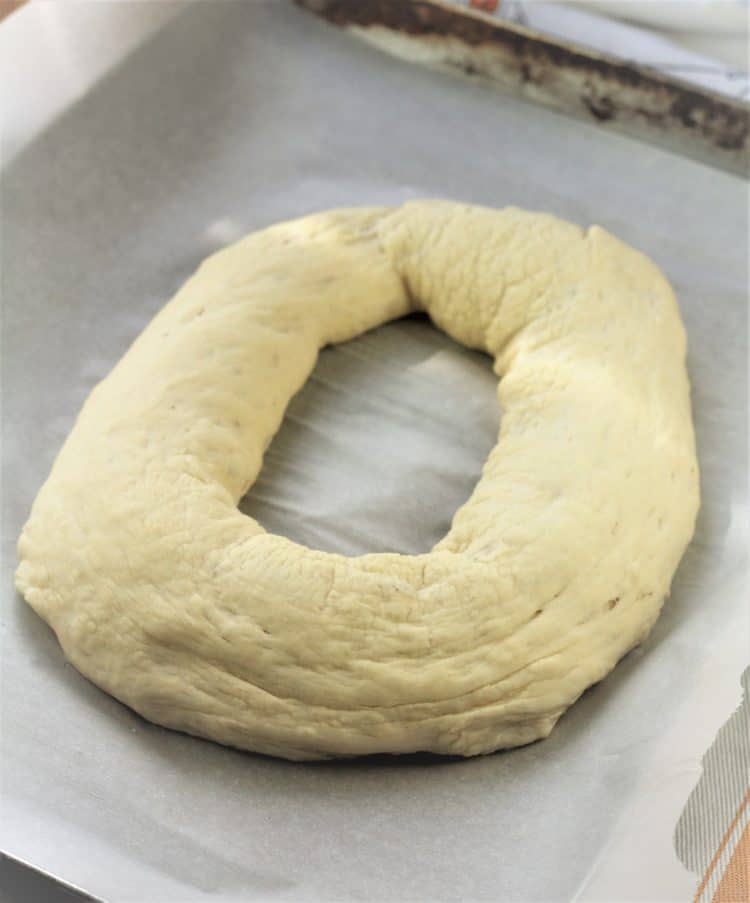 Meanwhile, preheat oven to 350F. After the second rise, bake the bread until golden and it sounds hollow when tapped underneath, about 30 minutes.
Remove from the oven and let sit until cool enough to handle. However, do not let it cool completely or it will be more difficult to cut in half.
Use a sharp knife to make a slit on one side of the bread and use string (I used butcher’s string) to slice the bread in half. You can definitely use a knife to do so, however the string leaves the surface of the bread with indentations which catch the olive oil or other seasoning you may use to serve it with.
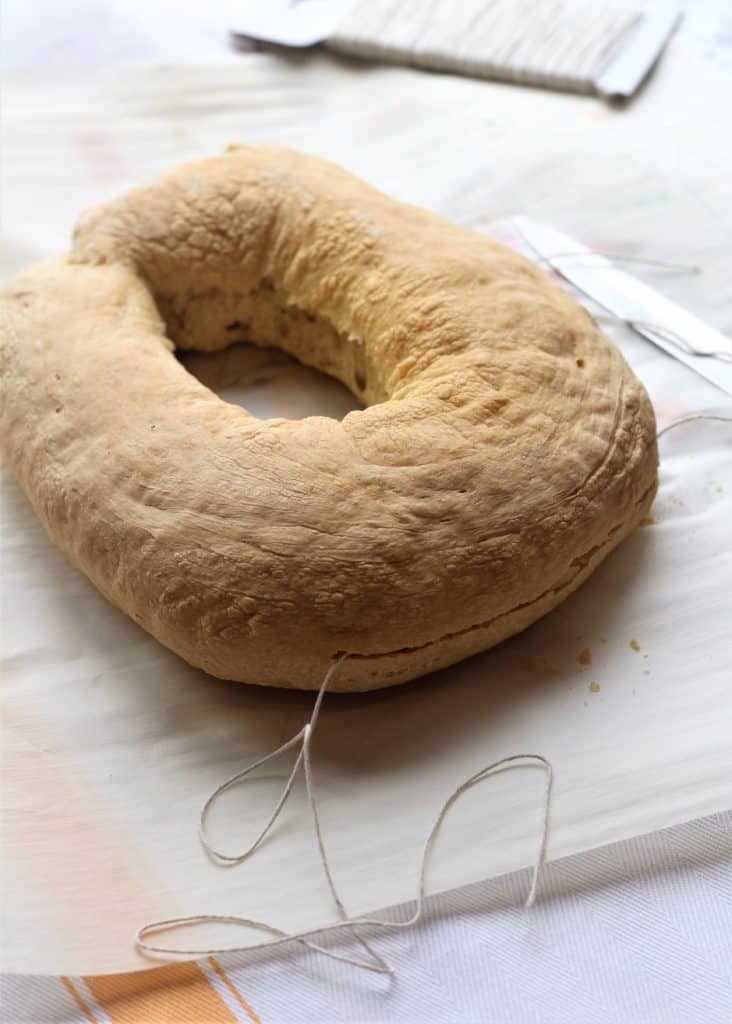 Reduce the oven temperature to 225F and bake for approximately 2 hours or until the bread is completely dry and cracks easily. Let cool and store in a paper bag in a cool dry place.
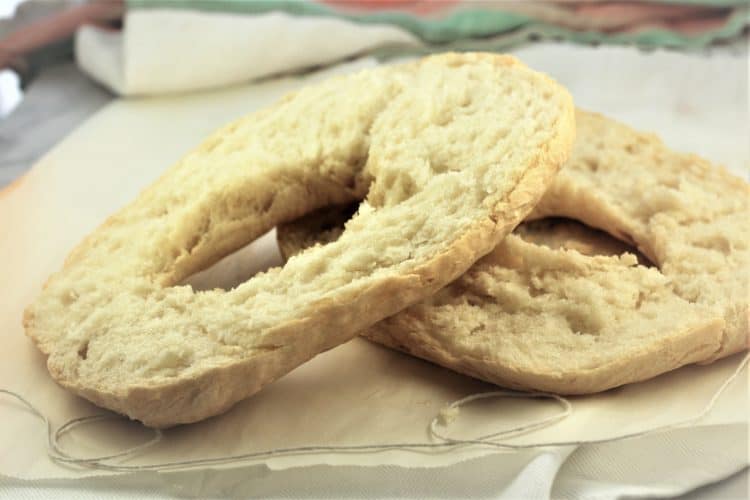
Tips and suggestions:
- Swap out some of the white all purpose flour and replace with whole wheat flour, if you prefer.
- If you don’t have butchers string you can use a sharp knife to slice the bread in half.
- Since it is dry, hard bread will keep indefinitely stored in a paper bag.
- If you prefer individual portioned hard bread, divide the dough into 8 portions and shape each into a circle.

You’ll enjoy having your own stash of hard bread in the pantry for easy last minute meals or snacks! If you try out this recipe, please let me know if you’ve enjoyed it by rating it in the reipe card below. Feel free to Pin it for later. Buon appetito!

Ingredients
- 1 envelope dry yeast (8 grams)
- 1 tsp granulated sugar
- 1 1/4 cups lukewarm water divided
- 3 1/2 -4 cups all purpose flour divided
- 1 tsp salt
Instructions
- In a small bowl, dissolve dry yeast and sugar in 1/2 cup of lukewarm water. Let sit for 10 minutes until it bubbles.
- Meanwhile, stir 3 1/2 cups flour and salt in a large bowl. Make a well in the center and pour in the yeast mixture. Stir with a wooden spoon until a raggedy dough shapes. Pour in another cup of lukewarm water and stir. It will be very liquidy. Add the remaining flour, if needed, and stir until a dough begins to take shape.
- Place the mixture on a lightly floured clean surface and knead for about 10 minutes until a smooth, elastic dough is shaped.
- Place in a large bowl greased with olive oil, cover with plastic wrap and set aside to rise for 2 hours. After the dough has risen, punch it down and divide in half. Roll each half into a long rope and seal the ends together to form a circular or oval shape. Place on a parchment paper covered baking sheet and let rise another 30 minutes.
- Meanwhile, preheat oven to 350F. After the second rise, bake the bread until golden and it sounds hollow when tapped underneath, about 30 minutes.
- Remove from the oven and let sit until cool enough to handle. However, do not let it cool completely or it will be more difficult to cut in half.
- With a sharp knife, make a slit on one side of the bread and use string (I used butcher's string) to slice the bread in half. You can definitely use a knife to do so, however the string leaves the surface of the bread with indentations which catch the olive oil or other seasoning you may use to serve it with.
- Reduce the oven temperature to 225F and bake for approximately 2 hours or until the bread is completely dry and cracks easily. Let cool and store in a paper bag in a cool dry place.
Notes
- Swap out some of the white all purpose flour and replace with whole wheat flour.
- If you don't have butchers string you can use a sharp knife to slice the bread in half.
- Since it is dry, hard bread will keep indefinitely stored in a paper bag.
- If you prefer individual portioned hard bread, divide the dough into 8 portions and shape each into a circle.
- Please note that the nutritional information provided is per loaf of bread therefore calories and nutritional information will vary according to exact portion size.


Hi Nadia
Thank you so much for this recipe. I am in Australia so have changed measurements accordingly. Can I please have clarification as the recipe states 3 1/2-4 cups all purpose flour. Do you mean three and a half to four cups or as stated under instructions step 2. do you start with 3 1/2 cups and then pour another cup of lukewarm water and then add remaining flour. Would this remaining flour be 1/2 cup? this is what I have done. My bread is at the second rise point right now so I am keen to see if it turns out as I really don’t know what the flour portion should be. Thank you
Hello Trish, we are so used to cups here in Canada however I am able to convert my recipes in order to provide a metric option. At the bottom of each ingredient list you would just have to click on ‘metric’. Regarding the flour, you are correct, in fact I do need to make that more clear. I add the 3 1/2 cups at the beginning and up to an extra 1/2 cup, as needed, to form a dough that holds together. Please do let me know how it turned out and thank you for your question!
I grew up on the Amalfi coast and my mom would make the “ hard” bread to last a few winter months. It was kept in a special wooden box. I made it too until my ga g grew up and I would buy the friselle sold in Italian stores. I have started to make mine again . My mom and now I make it with a mixture of whole wheat and white flour. But we make a long Italian style loaf( instead of round) and then when cooked but while still warm we cut it in pieces and rebake it. I always thought that the idea of bruschetta came from this tradition. Southern Italy was very inventive in their cooking, baking and “ la culinary povera “ was usurped by fancy chefs and brought to North America as a new idea. ThePanzanella salads was with the same bread too. Love your posts..
Hi Gina, most people call this bread friselle but for me it was always ‘pani duru’. Also my mom does not make it in small bagel type round shapes but large loaves cut in half. It does sound very much like bruschetta, doesn’t it? I’m not sure if it came from this idea but it is indeed the perfect example of cucina povera and not wasting anything. I recall my nonno and my parents covering it with warm milk for their breakfast. It was quite good and I must admit I haven’t had it this way since I was a child. Thank you Gina, for your lovely feedback!
Hello Nadia,
Thank you so much for this recipe. As I look the recipe over are these the ingredients of your mother’s regular Italian bread? If so, then it can be baked without the second 2 hour bake to have as a delicious everyday bread? I just love to hear the ways of our Italian parents and grandparents, and I believe that because of what they ate , and passed down to us to make, is a factor in their longevity. We grew up with so much “Veduda” meaning, in general ,”greens” like swiss chard, green beans, kale, broccoli, zucchini…. So I was excited to see your recipe with the stewed green beans and tomatoes.
I hope you and your family stay well and healthy.
HI Joanne, that’s exactly right. It’s the same recipe that then she bakes again to harden it but you can just skip that final step and enjoy fresh bread. This is also the same recipe she uses to make her cuddura cu l’ova, that is the Easter bread with eggs in it. I agree with you, we definitely learned to eat well because of them. Although I did not appreciate all that “verdura” when I was a kid, I do enjoy it now and prepare it often for my family. All the best to you and your family as well, stay safe!
Yes, I do know this, or something very similar that I know by the name of “frisella”. And served much like this, with tomato salad on top and perhaps olives and anchovies, too. Could it be the same thing with a different name, I wonder?
I think it’s the same, just that we’ve always simply called it pani duru. According to my cousin in Sicily the individual portion smaller ones are friselle whereas this regular sized loaf of bread cut in 2 is pani duru. Not sure, however which ever way you call it is delicious!
Thanks so much for your recipe for Pani Duru! Another gem. My mother-in-law always had this available in her home, but she purchased it at the local bakery and di not have a recipe to give to me.
Hello Pat, thank you! My mom has always made huge batches of this bread whenever she bakes bread. And then, of course, she hands over a bag for me to take home! But as you can see, it is quite easy to make. Hope you give it a try!