

One of the easiest homemade pastas you'll ever make with no pasta machine necessary. Follow my easy step by step instructions on how to make cavatelli pasta with an eggless pasta dough consisting of only 2 ingredients, semolina and water, and you'll have a fresh batch of pasta to enjoy in an hour!

I recently posted my mother's recipe for Chicken Cacciatore where I mentioned that she always serves this dish with her homemade cavatelli. Since then I've had several requests for this recipe. In reality, I've never made my own cavatelli until now and I can't believe how easy it is!
All you need are two ingredients (unless you count the salt): semolina flour and water. That's it! In fact this is the same eggless pasta dough that is used to make several pasta shapes including busiate and orecchiette.
And you don't necessarily need a gnocchi board to shape them. It's just that I find they look so pretty with the ridges, wouldn't you agree? But you can simply roll them with your fingers just like my mother does. I'll show you how to do that further below.

What is cavatelli?
Cavatelli pasta is quite typical of Southern Italy. This elongated pasta shape made with a simple eggless dough has a hollowed out interior which is perfect for catching the sauce it is paired with.
Cavatelli is famously paired with broccoli or rapini but also delicious with tomato based sauces. See further below for a list of serving suggestions.
What is semolina?
Semolina is a type of flour made from durum wheat. This is the same flour used to make dry pasta so it comes as no surprise that semolina is most commonly used in Italy! It can also be used in making bread, as I did in this Semolina Bread with Sesame Seeds recipe.
Semolina is much higher in gluten as compared to regular flour and this helps the pasta hold it's shape. It also has a courser, grainier texture and has a pale yellow color.
If you're wondering where you can purchase semolina, you'll find it in most grocery stores usually near the other types of flour.
Can cavatelli be made with other types of flour?
Cavatelli can be made with only semolina flour (as this recipe is); with all-purpose flour only or with a combination of semolina and all-purpose flour.
The following are step by step instructions with images to guide you through the recipe. You'll find the detailed printable recipe card at the end of this post.
Step by Step Instructions
Prepare the dough
Place semolina flour in a bowl or in a mound directly on your work surface. I prefer starting off my dough in a bowl and once the dough starts to take shape, I transfer it to my counter in order to knead it. Stir salt into the flour.
Bring 1 ¼ cups of water to a boil. Make a well in the center of the semolina and pour in 1 cup of boiled water.
Use a fork or wooden spoon to begin combining the semolina flour with the water. Use your hands to gather the crumbly bits to shape into a dough. The dough will be very crumbly and grainy, this is normal! Transfer to a clean work surface and knead until a smooth dough is formed. This will take about 5 minutes. The dough must be neither sticky nor too dry and should feel slightly tacky. If it is too dry, add a spoonful of the remaining water at a time, as needed. Wrap in plastic wrap and set on your counter to rest for 30 minutes.
Divide the dough into 8 pieces. I find it easier to roll a smaller portion of dough at a time. Keep the remaining dough wrapped in order to prevent it from drying out.
Roll each piece of dough into a long rope of about ½ cm in diameter. Place your hands in the center of the piece of dough and roll by applying pressure outward to lengthen the rope. Do not add extra flour to your work surface.
Cut into approximate 2 cm pieces.
How to shape cavatelli:
Choose one of the methods below:
Roll onto a gnocchi board
or use your index and middle fingers to press down on the dough and roll toward you to create an indentation. Do press down and make as deep an indentation as possible. Unlike gnocchi dough, which is much softer, semolina pasta dough is much more firm and will not break apart.
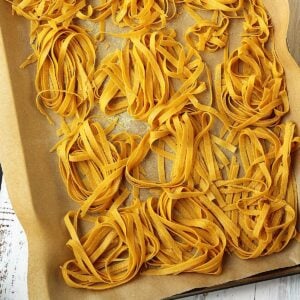
Place cavatelli in a single layer on parchment paper or clean dish towel covered baking sheets.


How to cook cavatelli:
Cook the cavatelli in a large pot of salted boiling water until they float to the surface then let boil for 3 minutes. The cooking time may vary according to the thickness of your pasta.
To serve:
Use cavatelli to replace other types of pasta in almost any recipe that calls for a medium length pasta. The most common pairings for cavatelli are rapini (broccoli rabe) or broccoli.
Here are a few recipe suggestions:
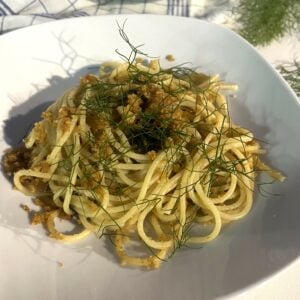
- Pasta with Rapini, Anchovies and Crushed Almonds
- Pasta with Broccoli
- Sicilian Pasta with Cauliflower
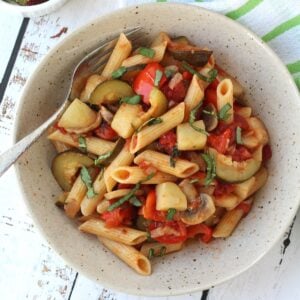
- Pasta with Zucchini and Mushrooms
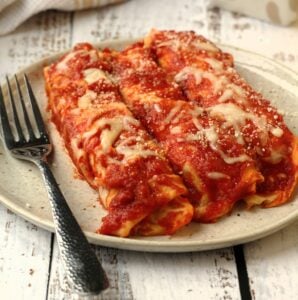
- Other delicious pairings include basil pesto, pistachio pesto or my mom's famous meatballs with tomato sauce. The choices are endless!
Tips and suggestions:
- Cavatelli made with semolina flour tend to be chewier than other types of pasta. For best results, do roll the ropes of dough as thin as possible. Also, when rolling the individual cavatelli either with your fingertips or gnocchi board, do press down and make as deep an indentation as possible.
- This recipe can be doubled to feed a larger crowd.
- Cooking time may vary according to the thickness of your cavatelli. The thicker they are the longer they will take to cook.
- Cavatelli can be frozen: place baking sheets with cavatelli in the freezer until they are firm. Transfer to well sealed freezer bags and freeze for up to 3 months.
- Frozen cavatelli will take a few minutes longer to cook.
This is a great recipe to get the kids involved in the kitchen! If you try out his easy recipe, let me know how it turned out by rating it in the recipe card below! Buon appetito!

Homemade Cavatelli Recipe
Ingredients
- 2 ½ cups semolina flour
- ½ teaspoon salt
- 1- 1 ¼ cups boiling water
Instructions
- Place the semolina flour in a bowl or in a mound directly on your work surface. I prefer starting off my dough in a bowl and once the dough starts to take shape, I transfer it to my counter in order to knead it. Stir salt into the flour.
- Make a well in the center of the semolina and pour in 1 cup of the boiled water.
- Use a fork or wooden spoon to begin combining the semolina flour with the water. Use your hands to gather the crumbly bits to shape into a dough. The dough will be very crumbly and grainy, this is normal!
- Transfer to a clean work surface and knead until a smooth dough is formed. This will take about 5 minutes. The dough must neither be sticky nor too dry. It should feel slightly tacky. If it is too dry, add a spoonful of the remaining boiled water at a time, as needed. Wrap in plastic wrap and set on your counter to rest for 30 minutes.
- Divide the dough into 8 pieces. I find it easier to roll a smaller portion of dough at a time.
- Roll into a long rope of about ½ cm in diameter. Place your hands in the center of the piece of dough and roll by applying pressure outward to lengthen the rope. Do not add extra flour to your work surface.
- Cut into approximate 2 cm pieces. Roll either using a gnocchi board or with your index and third finger to form an indentation in the dough.
- Place in a single layer on a parchment paper or clean dish towel covered baking sheets.
- Cook the pasta in a large pot of salted boiling water. The cooking time may vary according to the thickness of your pasta. Mine took about 3 minutes to cook.
- Serve with your favorite sauce.
Notes
- Cavatelli made with semolina flour tend to be more chewy than other types of pasta. For best results, do roll the ropes of dough as thin as possible. Also, when rolling the individual cavatelli either with your fingertips or gnocchi board, do press down and make as deep an indentation as possible.
- Cavatelli can be made with semolina flour only; a combination of semolina and all-purpose flour; or only all-purpose flour.
- This recipe can be easily doubled to feed a larger crowd.
- Cooking time may vary according to the thickness of your cavatelli.
- Cavatelli can be frozen: place baking sheets with cavatelli in the freezer until they are firm. Transfer to well sealed freezer bags and freeze for up to 3 months.
- Frozen cavatelli will take a few minutes longer to cook.
Nutrition
We are a participant in the Amazon Services LLC Associates Program, an affiliate advertising program designed to provide a means for us to earn fees by linking to Amazon.com and affiliated sites.
 2 Pack")
P. Dema
Hello Nadia! Thank you for this post and the recipe. My mother's people were originally from Calabria, who often made homemade Cavatelli. She made them with the two-finger "roll, pinch, and push off method." She referred to this method as making Cavatelli "cicateddha." Supposedly, from my research, "cicateddha" was a word used to characterize a somewhat similar motion of a different nature. The word referred to a drunkard rolling toward you on the sidewalk, so to avoid him making physical contact with you, you put two hands on him and pressed firmly, and then push him abruptly away toward the direction from which he rolled toward you. Characterizing, as you described, roll the dough with to fingers towards you and press down firmly, and then push the Cavatelli off in the direction from which it came.....from which you rolled it toward you. They didn't have a specific word to describe the method, so they borrowed a word they knew that would characterize the motion of the technique. This term was widely used by many Italian Americans of the First and Second World War generations. I am curious, have you heard this characterization applied to the two-finger technique for making Cavatelli? Thank you again for the post.
Nadia
Hi, thank you for that interesting description. I always love hearing about the meaining behind certain words in different dialects! It is not a word I am familiar with as my origins are Sicilian, although there are definitely several words in both dialects that are quite similar. I must ask my Calabrese friends if they are familiar with this word. Thanks for sharing!
Antonietta Di Marco
Hello Nadia
Thank you sharing your traditional recipes. I have made these cavatelli and love them but I find them more on the heavier dense side when eating. Am I using too much flour. What density should they be and or maybe it’s the size that could make a difference.
I like them and find them to be a dense pasta. Also, I’ve add spinach to mine to change them up.
Nadia
Hello Antonietta, indeed I agree with you that cavatelli made with semolina tend to be a little more chewy and that is normal. A few tips: do try to roll the ropes of dough as thin as possible; and when you are rolling them, either with your finger tips or a gnocchi board, do press down and make an indentation as deep as possible. I feel this helps to make them less dense. And finally, I tested out the recipe with half AP flour and half semolina flour and I found them to be perhaps just a little less dense. You might want to give that a try as well. Hope this helps and thank you for your feedback, it is appreciated!
Greg Roddy
Hello and thank you for the article. I am trying this for the first time and I was wondering if you use regular semolina or the finer rimachinatta semolina flour?
Nadia
Hi Greg, I used regular semolina for this recipe. Thanks for your question!
Anna Bucciarelli
In my mind there is nothing as joyous as a plate of Cavatelli sitting in front of me! It is truly a delight for me to sink my teeth into these small dumpling-like pastas, always evoking memories of my mama with a huge mound of flour (sometimes only plain flour, no semolina, depending on budget) on the enameled kitchen table, a well in the middle of it and gently pouring water into it a bit at a time until she had the proper consistency. She (and I) used a fork to get the line definitions but when in a hurry she just used her thumb to make a bit of an indentation in the little balls of dough and that was mighty fine too. It has been a long time since I made Cavatelli but thanks to you I am inspired to make a batch for my family when we crawl finally out of these days of keeping our distance, illness and deaths behind us (and it will happen) when we will together enjoy our Easter feast with stuffed artichokes, antipasto, Pizza Chiena, Cavatelli in a velvety and luscious tomato sauce, then a giant and beautiful spring leg of lamb with roasted potatoes with onions, asparagus, on and on until we come to the usual Easter pies, mostly made with various ricotta fillings. I will soon by 84, never am sure how much longer I will have to enjoy making the things I grew up with, but I will not stop until I drop! That said, inspiteof the sadness of our country's and the world's current situation, I wish you, Nadia, and all those you hold dear, the blessings of a holy Easter. Thank you again for keeping old traditions alive.
Nadia
Dearest Anna, I'm so glad to hear form you! I must admit, with all that's going on in recent weeks you have come to my mind and I was hoping all is well with you! That said, I agree with you, I just love this toothsome pasta as well. Sometimes my mom makes them with all purpose flour too. I simply found them easier to roll with the semolina. Food has such a wonderful way of evoking wonderful memories, I totally agree! I enjoyed making several batches with the help of my children as I perfected this recipe. Together, we made a batch in less than an hour. Your description of your Easter feast is mouth watering! As I told my mom, we will celebrate later when this is all over. It's never too late! Until then, I wish you lots of good health so that you can continue creating these feasts for your family! Stay well my dear and thanks again for sharing your thoughts and memories with me. They are truly appreciated!