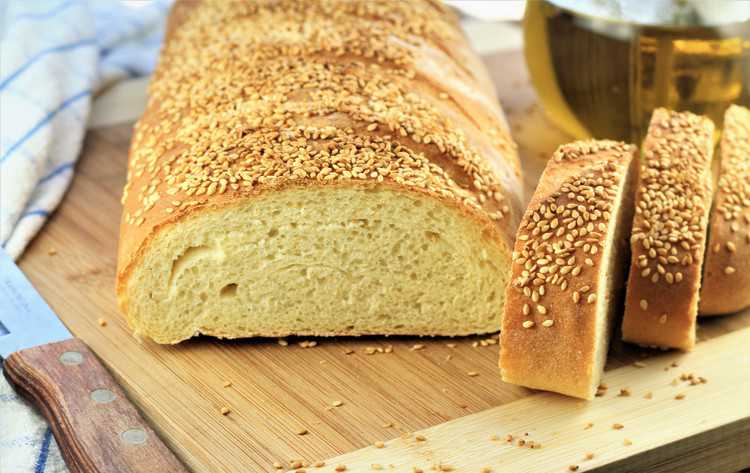
Semolina bread with sesame seeds is quite typical of Sicily. This rustic loaf has a crusty exterior, a pale yellow interior due to the use of semolina flour and is topped with sesame seeds giving it a wonderful crunch and nutty flavor!
This post contains affiliate links.
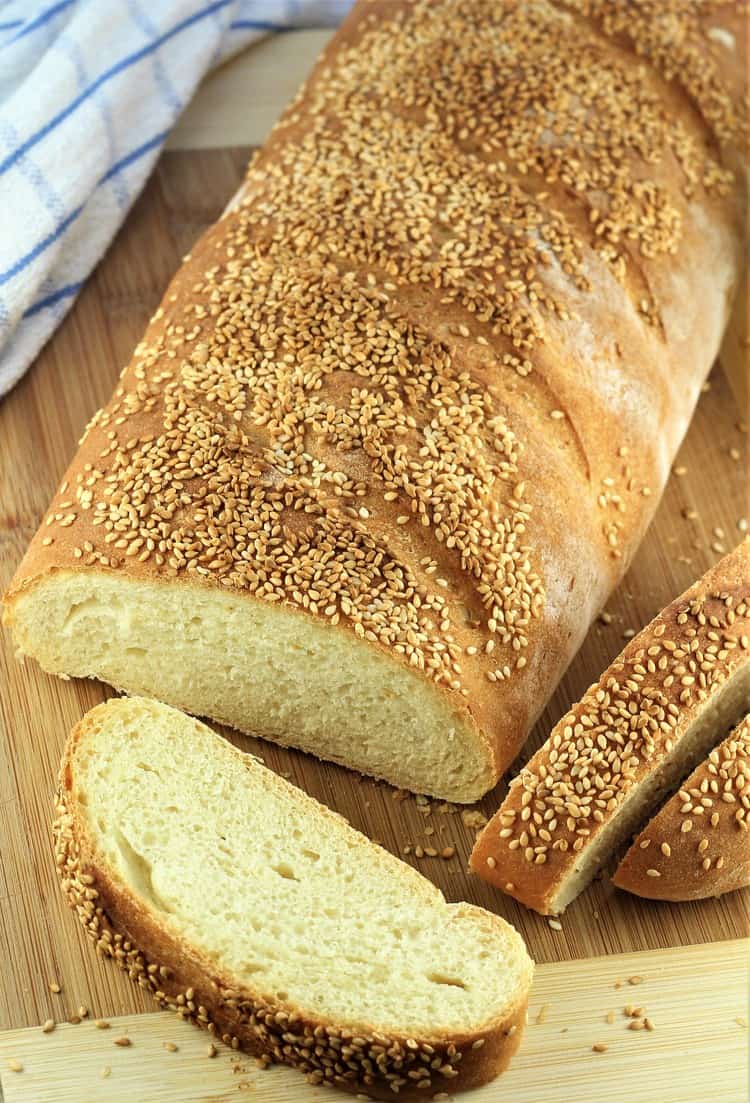
Semolina bread with sesame seeds is commonly found in Sicily. In recent trips there, I enjoyed this rustic, hearty country style bread. Made with mostly semolina flour, this bread has a crumb which is much more dense than your typical loaf. It definitely gives you something to sink your teeth into!
I've been working on this bread recipe for almost a year now. I tried several times to make it with only semolina flour however I was not satisfied with the texture. However, I have finally found a combination of mostly semolina flour and some all purpose white flour that, in my opinion, comes close to the bread I enjoyed during my travels!
What is semolina flour?
Semolina flour is made from durum wheat and this is the same type of flour used for making dried pasta. The semolina I used is a double milled flour (much finer texture) referred to as sesa I actually found this product imported from Italy at my local grocery store and found that Amazon also sells it. Here's a link for that flour:
 Molino Antimo Semolina Semo...Shop on Amazon
I have, however, made this bread with regular semolina flour usually located in the same aisle as other types of flour in the grocery store. This flour also works well for this recipe.
What makes this bread so typical of Sicily:
-
- The use of double milled semolina flour.
- Sesame seeds sprinkled on the bread adding a wonderful nutty flavor and crunch to the bread which I find particularly satisfying.
- The elongated shape of this bread, often referred to as a filone.
The following are step by step instructions with images to guide you through this recipe. You'll find the complete detailed printable recipe card at the end of this post.
How to make Semolina Bread with Sesame Seeds:
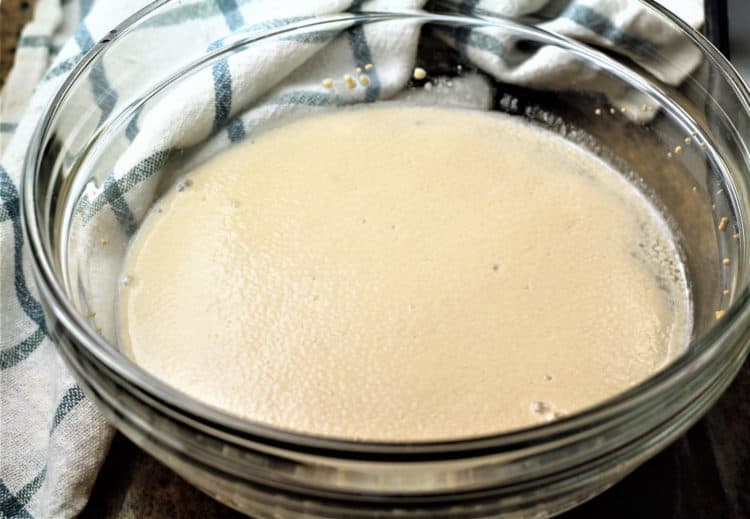
Begin by proofing your yeast: heat water until lukewarm and place in a small bowl. Stir in honey until it dissolves. Add an envelope of instant yeast (8 grams), stir gently and let sit until foamy, about ten minutes.
Meanwhile, add semolina, all purpose white flour and salt in the bowl of your stand mixer. Mix until combined. Pour in the yeast mixture and on gentle speed mix until combined and a dough begins to form. The mixture will be very wet at first, this is normal.
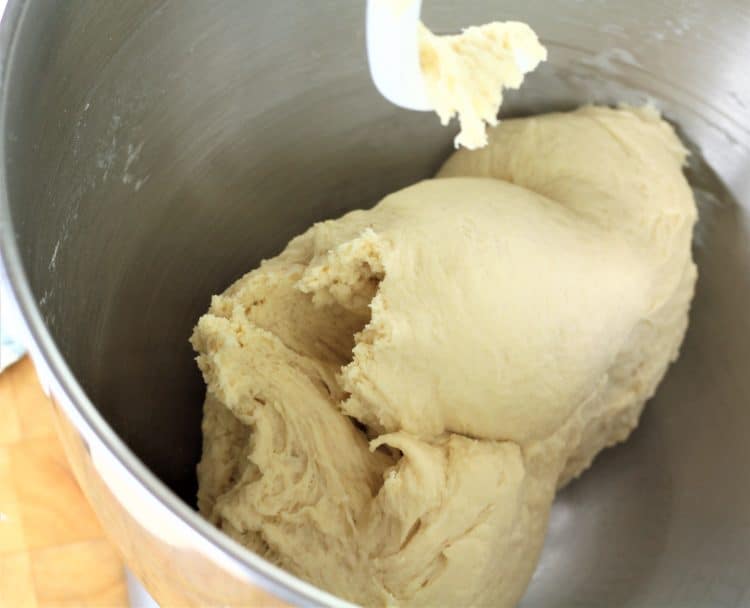
Mix on medium speed for eight minutes until the dough is smooth and elastic. After 4-5 minutes of kneading, the dough will wrap itself around the hook (as shown) and pull away from the sides of the bowl. The dough will be slightly sticky and soft.
Shape into a ball. Transfer to a greased bowl, cover with plastic wrap and place in a warm area, free from draft until it doubles in bulk, about two hours.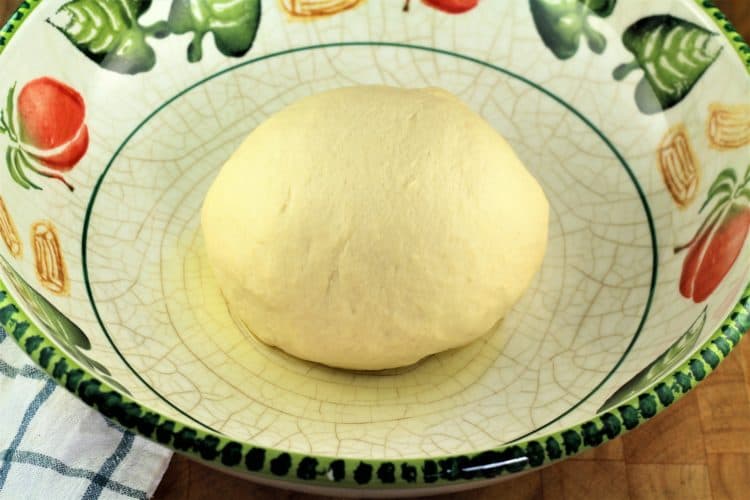 Shape the dough: after two hours have passed, transfer the dough to a lightly floured work surface. Punch down the dough and using your finger tips, flatten the dough into a rectangle, about 13 x 9 inches.
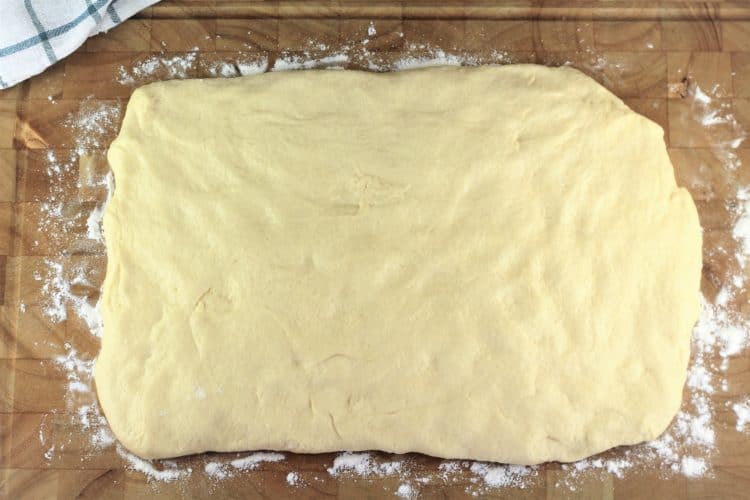
Fold the long edge of the dough ⅔ of the way toward the center of the rectangle, as shown. 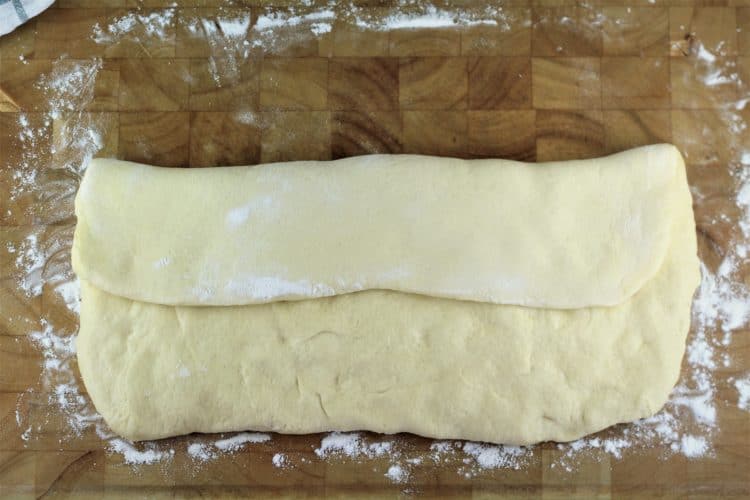
Fold the other long edge over the the first fold, as shown. Tuck in the ends by making a small fold toward the interior of the bread in order to seal the ends. 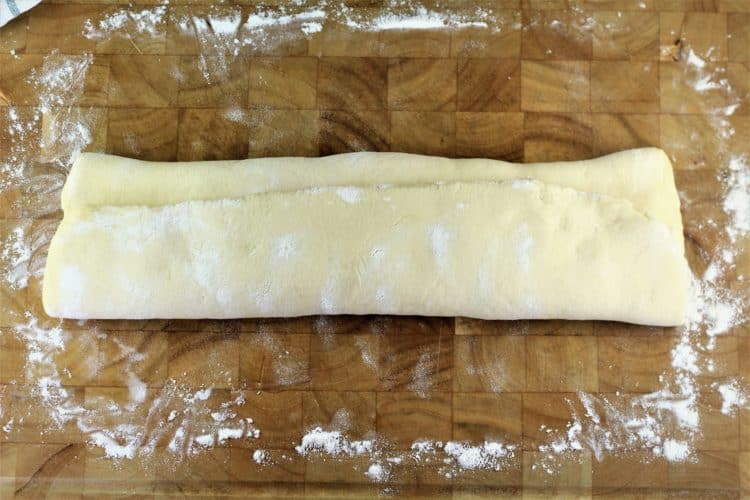
Turn the dough over and carefully lift onto a parchment paper covered baking sheet. 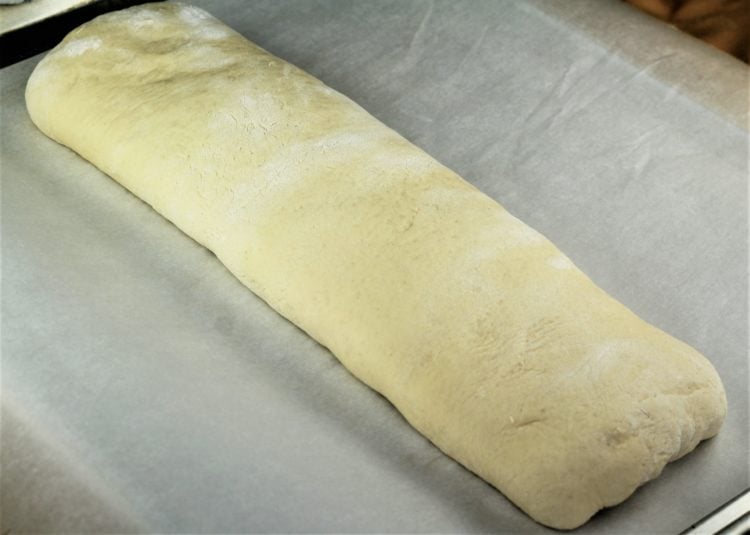
Lightly brush the surface with water and top with sesame seeds. Use a sharp knife to make four or five horizontal slits on the dough. Cover with a clean tea towel and let rest for thirty minutes.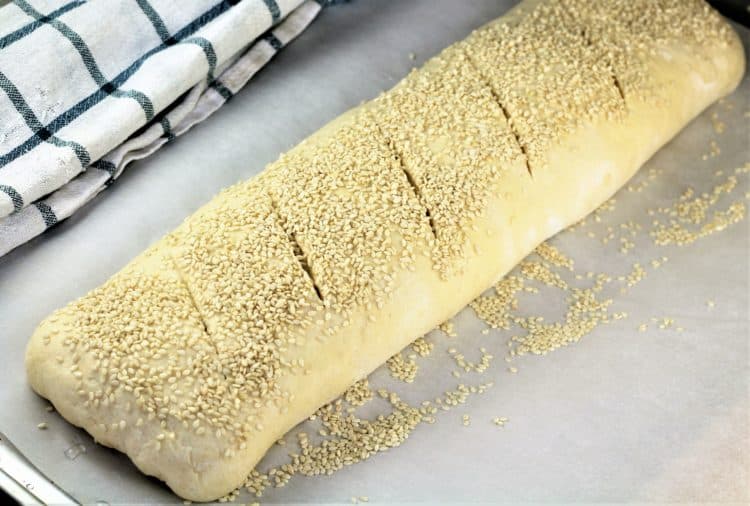
Meanwhile, preheat oven to 425F and place a pan of water on the bottom rack of your oven. Bake for 20 minutes, then reduce oven to 375F and continue baking for ten to fifteen minutes longer, until the bread is golden and sounds hollow when tapped.
Transfer to a wire rack and allow it to cool completely before slicing it. 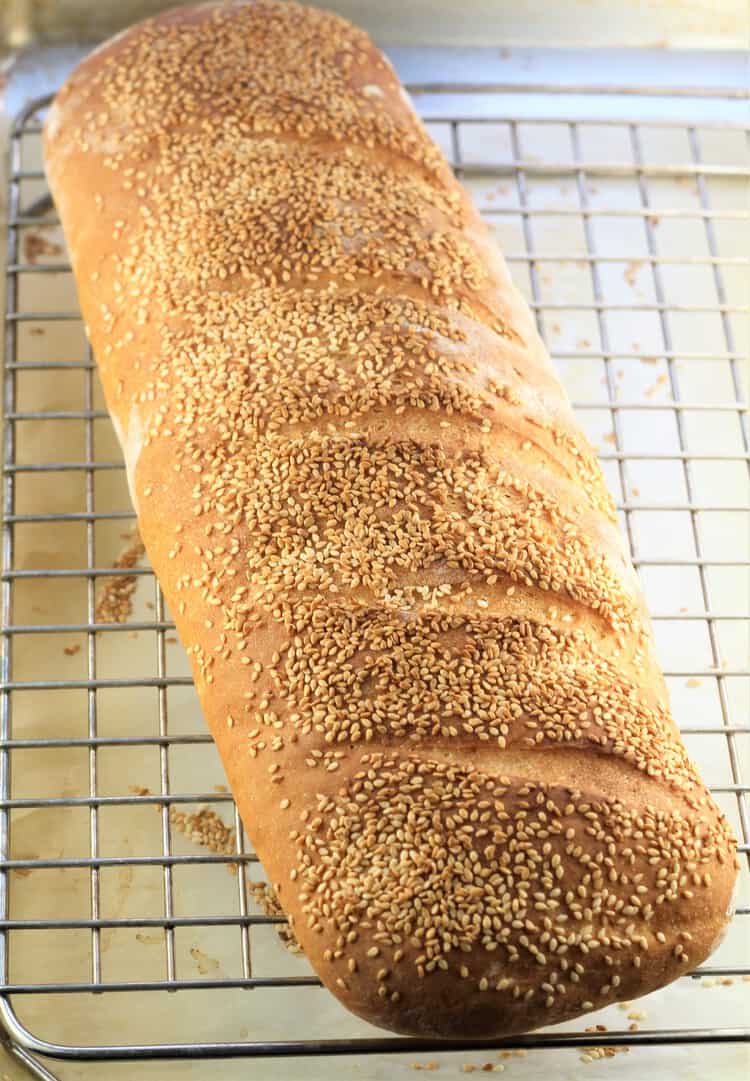
Check out my Google Web Story here!
Is it possible to make Semolina Bread with Sesame Seeds without a stand mixer?
The answer is yes! The only difference is that you will have to handle the stickier dough by hand. After testing this method several times I conclude that it does work.
- Combine semolina flour, all-purpose flour and salt in a bowl.
- Make a well in the center and stir in the proofed yeast with a wooden spoon until a raggedy dough takes shape.
- Transfer the mixture onto a well floured surface and knead the dough for about 5 minutes. Add a spoonful of flour at a time as needed if the dough becomes too sticky to handle.
- Shape into a ball and proceed with the recipe.
Can semolina bread dough be prepared a day in advance?
Yes it can. Let the dough rise at room temperature for 1 hour and refrigerate overnight. Let the dough come to room temperature, about 2 hours, before proceeding to shape it as outlined in the recipe.
Tips and suggestions for making Semolina Bread with Sesame Seeds:
- If you can not find double milled semolina flour in your grocery store, regular semolina flour will work as well.
- The dough for this bread will be slightly sticky and softer than most other bread dough. This is normal.
- Place a pan of water on the lower rack of the oven while baking to give the bread a crusty exterior.
- Wait until the bread has cooled completely before slicing it.
- Store the bread well sealed at room temperature for up to three days.
- Freeze the bread in a freezer bag for up to a month.
- I enjoy using this bread to make bruschetta. It is also perfect with one of my favorite egg recipes, my dad's famous fried tomatoes with eggs
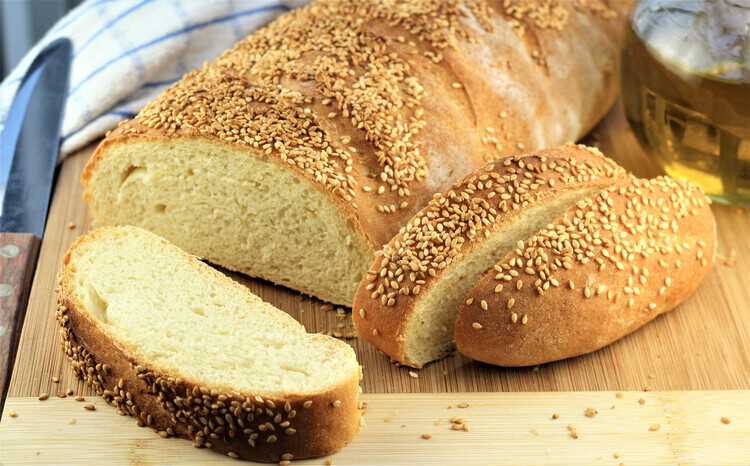
Is there anything better than the scent of fresh bread baking in your home? Now you can make your own hearty, country style Semolina Bread with Sesame Seeds for your family! Let me know how much you enjoy it by tagging me with your bread photos with @mangiabedda or #mangiabedda on Facebook or Instagram. Buon appetito!
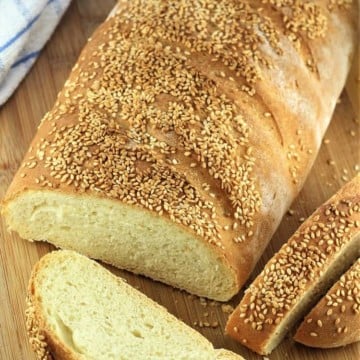
Semolina Bread with Sesame Seeds
Ingredients
- 1 envelope dry yeast (8 grams)
- 1 ⅓ cups water
- 2 teaspoon honey
- 1 ¾ cups durum semolina flour
- ¾ cups all purpose flour
- 1 teaspoon salt
- 2 tablespoon sesame seeds
Instructions
For the dough:
- Begin by proofing your yeast: heat water until tepid and place in a small bowl. Stir in honey until it dissolves. Add an envelope of instant yeast (8 grams), stir gently and let sit until foamy, about 10 minutes.
- Meanwhile, add the semolina flour, all purpose flour and salt in the bowl of your stand mixer. Mix until combined. Pour in the yeast mixture and on gently speed mix until combined and a dough begins to form. The dough will be very wet at first, this is normal. Mix on medium speed for 8 minutes until the dough is smooth and elastic. After 4-5 minutes of kneading the dough will wrap itself around the hook and pull away from the sides of the bowl. Transfer to a greased bowl, cover with plastic wrap and place in a warm area, free from draft until it doubles in bulk, about two hours.
To shape the dough:
- After two hours has passed, transfer the dough to a lightly floured work surface. Punch down the dough and using your finger tips, flatten the dough into a rectangle, about 13 x 9 inches.
- Fold the long edge of the dough ⅔ of the way toward the center of the rectangle. Fold the other long edge over the the first fold.. Tuck in the ends by making a small fold toward the interior of the bread in order to seal the ends.
- Turn the dough over and carefully lift onto a parchment paper covered baking sheet, seam side down.
- Lightly brush the surface with water and top with sesame seeds. Use a sharp knife to make three or four horizontal cuts on the dough. Cover with a clean tea towel and let rest for thirty minutes.
To bake:
- Meanwhile, preheat oven to 425F and place a pan of water on the bottom rack of your oven. Bake for 20 minutes, then reduce oven to 375F and continue baking for ten to fifteen minutes longer, until the bread is golden and sounds hollow when tapped.Transfer to a wire rack and allow it to cool completely before slicing it.
Notes
- Combine semolina flour, all-purpose flour and salt in a bowl.
- Make a well in the center and stir in the proofed yeast with a wooden spoon until a raggedy dough takes shape.
- Transfer the mixture onto a well floured surface and knead the dough for about 5 minutes. Add a spoonful of flour at a time as needed if the dough becomes too sticky to handle.
- Shape into a ball and proceed with the recipe.
Can semolina bread dough be prepared a day in advance?
Yes it can. Let the dough rise at room temperature for 1 hour and refrigerate overnight. Let the dough come to room temperature, about 2 hours, before proceeding to shape it as outlined in the recipe. More tips:- If you can not find double milled semolina flour in your grocery store, regular semolina flour will work as well.
- The dough for this bread will be slightly sticky and softer than most other bread dough. This is normal, do not add extra flour.
- Place a pan of water on the lower rack of the oven while baking to give the bread a crusty exterior.
- Wait until the bread has cooled completely before slicing it.
- Store the bread well sealed at room temperature for up to three days.
- Freeze the bread in a freezer bag for up to a month.
Nutrition
We are a participant in the Amazon Services LLC Associates Program, an affiliate advertising program designed to provide a means for us to earn fees by linking to Amazon.com and affiliated sites.




Rene
check your water amount, this happened to me, I messed up and added way to much (1-3/4 cups) water but realized it and made the adjustment and "Boom" perfect. if your dough does not come together its because the water measurement is not correct. hope this helps!!
Ashley
I made this today exactly as written, made by hand (no stand mixer) and baked in a loaf pan. Delicious! Perfect recipe. Half the loaf is gone after smothering with butter and apricot jam. I’m wondering if folks who had issues with this recipe were using the wrong grind/coarseness of semolina/durum flour?
Nadia
Hi Ashley, so glad you enjoyed this bread, thank you for taking the time for sharing your experience with this recipe!
JoAnne
I found the dough to be a little wet also. I was a little disappointed in the taste. It seemed a little sweet. Can the honey be cut down to one teaspoon and can I use more semiolina and less bread flour( I used bread flour). Otherwise the crust and texture were great
Nadia
Hi JoAnne, I have never found mine to be sweet but if you prefer you can definitely reduce it a bit, it should not affect the outcome. Glad you enjoyed the crust and texture. Thanks for your comment!
Dan
Hi!
My bread came out very good. The texture is amazing. The only negative point is a slight taste and smell of yeast. Do you have a preferred brand of yeast? I used the fast raising one from the supermarket, not the best quality.
Thank you for a great, easy recipe!
Nadia
Hi Dan, I'm so glad you enjoyed this delicious bread! I must say I have never had any issue with the odor or taste of yeast. Can it be perhaps the yeast you are using? Here in my area I use active dry Fleischmann's yeast and it works well for me. Hope this helps!
Jeanine Losino
This was my first time making it and it came out great! I had a hard time transferring it to the parchment (stretched it out a bit) but the texture was perfect and it tasted great. Highly recommend this recipe.
Nadia
Hello Jeanine, thank you for sharing your experience baking this bread. I'm so glad you enjoyed it, thanks!
NotHappy
This is an awful recipe. I’m wondering if the people who rated this even tried the recipe. I used the metric conversion, couldn’t even get the dough to come together. WAY too much liquid. Going to let the dough sit overnight and hopefully it will come together. This is a Waste of expensive ingredients
Nadia
I’m so sorry to hear you had difficulty with this recipe. Several readers have shared that it worked for them with a little extra flour added to the dough. I hope it worked out for you, thanks for your comment!
Frank Zullo
Unfortunately, I have had the same problem. Tried 3 times unsuccessfully, including the metric conversion as well as adding more flour. Very disappointed.
David Alexander
Sorry for your troubles. I can only tell you that I have made this bread about 6 times exactly as written, with no changes, and it is always perfect. I spooned both the semolina and all purpose flour into measuring cups and leveled off. As Nadia has noted, perhaps some semolina flours behave differently, where you may need just a bit more. But in my experience, there is nothing wrong with this recipe. As I and another have noted also, this dough is a wetter and looser dough than you may be used to; it is just the nature of this particular recipe. I urge you to try it again, perhaps with a different brand of semolina, and I think you will be rewarded with a wonderful loaf. Happy baking! Good luck!
Annie
This is an amazing recipe! Just like anything else when baking it might need a little more flour. I've made it several times adding a little more flour and it's my family and friends absolute favorite! Thank you Nadia!
Nadia
Thanks for sharing your experience baking this bread Annie!
Alex
Hi! Just a question if you wouldn't mind answering- if I wanted to double this recipe and make two loaves, how would you go about doing that?
Nadia
Hello Alex, I'll be quite honest I have never doubled this bread recipe before. However I have successfully doubled several other bread recipes, including my mom's Easter cuddura bread, by simply doubling all ingredients without any problem. Hope this helps!
Nancy
I found this recipe to be one of the best I've ever tried...and I've made many, many loaves of all kinds of breads. Yes, the dough is a bit wet, but I added about 2 or 3 tablespoons of flour and (like the recipe said) after 4-5 minutes the dough will start to form a ball. I will use this recipe again and today I'm going to try making sandwich rolls instead of a loaf. Thank you for sharing this recipe!
Nadia
Thank you Nancy for sharing your experience with this bread recipe. Much appreciated!
Alex
Weirdly, I had the opposite problem as everyone else; I had to ADD more water. The ingredients just wouldn't incorporate otherwise! (Next time I will try using weight instead of volume and see if that helps my problem any.) That said, it came out beautifully! It was the first loaf of bread I ever made and I am so proud of it!!!! Thank you for this recipe.
Nadia
Hello Alex, you are definitely the first to say that you needed to add water! So glad you enjoyed this delicious bread, thanks for sharing!
Joe
I'd like to make 2 loaves from this recipe, what would the cooking time be .
Nadia
Hello Joe, great question! Although I have not personally tried it, I think it would depend on the size of the loaves. For example, if they are more or less the same width as the original recipe, except shorter of course, the baking time should more or less be the same. What I would recommend as a first trial is reducing the initial baking time at 425 degrees F to 15 minutes instead of twenty. For the remaining time at 375 degrees F, check the loaves after 10 minutes. If they are golden both on top and underneath, and sound hollow when tapped underneath then they are ready. It may take some trial and error to get the exact time. Hope this helps and please let me know how they turn out!
David Alexander
Also, Joe, after following Nadia's instructions, if you have an instant read thermometer, most breads are usually done at 190 to 200 degrees F. If your bread is in that range, then make a note of the timing for the next time you make it. Happy baking!
Nadia
Hello David, thank you for your comment! You are absolutely right about the internal temperature, in fact I should get into the habit of using a thermometer to test when done myself. Thanks for sharing!
Meredith
I love this recipe. I’ve noticed a few comments that the dough is “soupy” and I can’t imagine why that would be. I make the dough by hand and begin kneading right in the bowl until it comes together and the bowl is completely clean, then finish kneading on the counter. I’ve never had to add any extra four. For the semolina I use “Caputo Antimo Di Grano Duro Rimacinata Semolina”. Hopefully that helps someone!
Anyway great recipe. About to tear into it now. 😁
Thank you, Nadia!
Nadia
Hello Meredith, thank you very much for sharing your experience with this bread dough. It's hard to say why some experience a soupy mixture and I wonder if it may be due to the semolina used? Anyhow, I'm glad you enjoyed this recipe, thank you!
Angela Lazzara
Made your semolina bread following your recipe. The only change was to use only 1 tablespoon of sesame seed. The bread came out wonderful, It was tasty, very soft and a nice crust. I am not new to baking bread but I have never made a semolina bread. I am also Sicilian, born and raised and I appreciate a good recipe.
My family was here for Sunday dinner and they finished all of the bread. I will make it again. Thanks for a nice and simple recipe.
Nadia
Hello Angela, thank you for sharing, I'm glad to hear your bread turned out great!
John
So I put it in the stand mixer for about 10 minutes and it never stuck to the hook I hand needed it on a floured surface but was unable to achieve the dough ball without adding more flour. I noticed my semolina flour bobs red mill no.1 says for superb pasta. Is this my problem because there's no way of handling this without adding more flour
Nadia
Hello John, indeed I have had a few readers inform me that they added a little extra flour in order to form a dough. From what I gather from my readers it appears that the type of semolina flour available in different parts of the world is not necessarily of the same texture. Therefore I do recommend adding extra flour as needed in order to get the recipe to work well. Thank you for your comment!
Richard
Are you sure there is no typos? I had to add a lot more flour, to get it smooth and elastic 1 1/3 cup of water and 2 1/2 cup of flour total just made a yellow paste
Nadia
Hello Richard, yes I am quite certain! Many have made the bread with success as is and some have have commented they they added some extra flour in order to make the recipe work for them. Did the bread turn out ok with the extra flour and water you added? I do hope so!
Richard
The bread came out perfectly, I cooked it in a oval dutch oven very nice, I'm thinking the type of floor might be the culprit so I'm going to get some double milled semolina, and try it again, either way it's great bread! I just came back from Puglia, visited Bari, Matera, and Lecci where I had that bread so as soon as I came home I had to make it!
Nadia
Hi Richard, thank you for following up on your experience baking this bread. I've never tried baking it in a dutch oven, like this idea. I've got to try it! It may indeed be the type of flour but I'm so glad you enjoyed it and that you compared it to that wonderful bread from Puglia. I've had the chance to try the famous bread from Matera as well and it was wonderful. Thanks again!
John
Are you using a convection oven or standard? My bread recipes are always different with convection thanks you!!! im excited to make this bread
Nadia
Hello John, I am using a standard oven when I bake this bread. Hope this helps and that you enjoy it!
Vesela
This bread is amazing. We broke it half an hour after it was out of the oven and ate most of it warm with some salted butter. Do yourself a favour and make it soon.
Nadia
Hello Vesela, I'm so glad you enjoyed it. Thank you for the lovely review!
Janet Jensen
Maybe you can give us the ingredients in grams...I measure flour with the fluff and scoop method. Was extremely soupy. Added about 3/4 more cup ap flour. Finally came to a ball. will bake anyway.
Nadia
Hello Janet, if you take a look at the end of the ingredient list in my recipe card you will find the word "metric", if you click on it you will get the measurements in grams. Hope this helps. May I ask which type of semolina you used? There are a few others that have experienced this and I'd like to know more detail to see if I can understand the problem and be able to help if I can. Thank you!
Janet Jensen
Thank you for your quick response. I used Bob's Red Mill No. 1 durum Wheat Semolina flour. I wound up throwing the dough away, but I will try again when I revisit the site and look for the amounts in grams and oz. Which flour do you typically use?
Nadia
I'm sorry you didn't get to bake it Janet. The amounts in grams are there if you wish to take a look. I use semolina rimacinata, whichever brand I find at my local Italian grocery store. More recently I tried Vecchio Molino brand.
David Alexander
Hello, Nadia:
I made this bread again last weekend to go with Lentil and Escarole soup, and as always it was perfect. I am wondering if some cooks have not followed the recipe and mixed in the mixer for 8 minutes as stated. In my about 5 times making this I have not found it necessary to add more flour. And yes, it is a somewhat more "soupy" dough than other breads. One thing I wanted to let you know, is that the recipe states to let rise for 2 hours on the first rise, but this time I found it was doubled within 45 minutes, so my advice is to start checking at 40 minutes as it may not take the full 2 hours. Many things such as temperature of the room, and humidity, can effect the rise. Happy baking!
Nadia
Hello David, thank you for chiming in with your input! I have indeed made this bread both with my mixer and by hand and have had success using both methods. It is truthfully more soupy at first but with a bit of patience and time it does work out well. Thank you for sharing your experience, I hope it is helpful to others!
Joe C.
We’ve tweaked the recipe a little bit. We use King Arthur Durum Semolina and have also used the coarse style semolina.
The tweak is to use bread flour (also King Arthur) instead of all purpose and to add about a tablespoon of vital wheat gluten. The dough stays very moist.
After the first rise (about 2 hours), I follow the recipe by forming the loaf on a floured surface. I flour both sides of the dough by giving it a flip on the floured countertop. I also deviate by shaping the loaf into a Batard (football) shape using a method found online.
I put the dough onto a piece of parchment paper placed on a pizza peel, brush with water, add seeds cover and then let it rise for 30 minutes.
The extra gluten changes the texture slightly but it also gives a very nice rise and open crumb.
Nora Z.
This turned out wonderful, just what I was hoping for! I love semolina bread and grew up eating it, but where I live these days it is very hard to find in a store. Thanks for sharing this recipe and giving me this taste of home.
Nadia
Hi Nora, I'm so glad you enjoyed it! I agree it is hard to find but thankfully not that difficult to make. Thank you for your comment!
Carmelo Assenza
Perhaps I didn't have the correct semolina flour, but it was awfully soupy and it did not wrap around the hook. I added 2 tablespoons of semolina flour and a 1/2 cup of white flour before it would wrap around the hook. I followed the recipe precisely as directed!
What have I done wrong!
Carmelo
Ormond Bch. FL.
Nadia
Hello Carmelo, I'm sorry to hear that this happened. Although it has never happened with me, a couple of readers mentioned the same thing. I'm wondering if it is perhaps the semolina? Can I ask which type you used? I have actually tried this recipe with semolina rimacinata and regular semolina when I ran out of the other type and both did work. Did the bread turn out ok even though you added extra flour? I do hope you were able to enjoy it regardless!
Andrea
Tasted okay, but the bread didn’t rise enough. It was rather dense. I’m guessing I should have let it rise for more than 30 minutes before putting it in the oven.
Nadia
Hello Andrea, I'm sorry to hear this. Was it very flat when you first shaped it? It does not usually need to rise more than 30 minutes before baking.
Colleen
Edible but didn’t come out the way it was supposed to, followed the directions, made other bread before never had a problem.
Nadia
Hello Colleen, I'm sorry to hear the bread did not turn out to your satisfaction. May I ask which step you had difficulty with or what, in your opinion, went wrong? Hoping to be of help!
Madison
Thanks for sharing this recipe! Do you recommend flouring your working surface with semolina or AP flour for shaping?
Nadia
Hi Madison, I generally use a bit of AP flour on my counter when shaping the bread. Hope you enjoy it!
Enzo
I had to hand mix this recipe so I needed to add a little bit more flour while mixing but it came out amazing. I used King Arthur bread flour instead of all purpose and i was very happy with the results. I have a question for you. If i want to pre make the dough Friday night for Sunday. Would you do anything different?
Thank you
Enzo
Nadia
Hello Enzo, I'm so glad it worked well for you. Yes, a little extra flour can certainly help. To be honest with you I have never tried making the dough in advance but it is something I'd like to try. When it comes to pizza dough, I often refrigerate it for up to 3 days, then let it come to room temperature before shaping it. However, the dough is quite soft for his dough so I'm not sure it will hold up after a couple of days. If you do give it a try please let me know how it turns out. Thank you!
Joe C.
Thank you Nadia for sharing your traditional family recipes.
This bread is has a very good texture, color and aroma. It helps me remember my family's Italian traditions from Calabria, a cooking style and method that seem to me to be very similar to Sicilian style cooking.
This semolina bread has become our family favorite. We enjoy it with our morning coffee, for making sandwiches, with meals and as a snack. A loaf doesn't last very long.
To those of you trying this bread for the first time, yes, the bread dough is sticky, but the high hydration level helps with the open crumb and texture that makes the bread so good.
We proof the shaped loaf on parchment paper lightly coated with coarse semolina flour and slide the risen bread onto a baking stone in the steamed oven. We let the stone pre-heat in the oven for about 30 minutes before baking
Follow Nadia's excellent recipe and tips and it will come out great.
Nadia, thank you again for sharing.
Nadia
Hello Joe, thank you so much for sharing your experience with my recipe. I realize that handling this dough is not always very easy due to the stickiness but it really does work and as you mentioned it contributes to creating a bread that has a lovely crumb and texture. Thank you for sharing your tips, I'm sure they will be useful to other readers as well! And thank you for taking the time to evaluate this recipe, much appreciated!